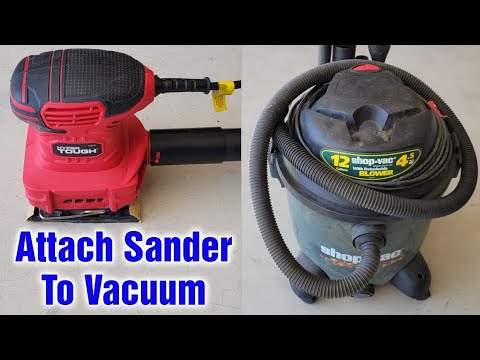
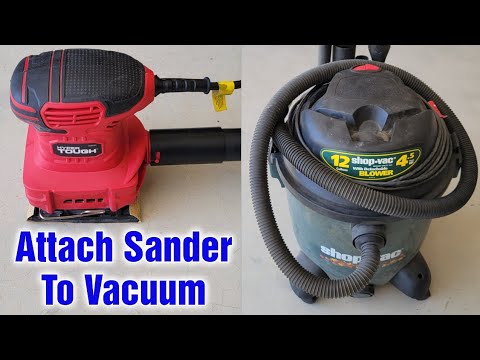
Are you tired of the dust and debris flying everywhere while sanding? Do you wish there was a way to keep your workspace cleaner and safer? Look no further! Attaching a sander to a vacuum cleaner can help you achieve just that.
Not only does connecting a sander to a vacuum cleaner reduce the amount of dust in the air, but it also saves time by eliminating the need for clean-up after the sanding is done. In this article, we will guide you through the simple steps to attach a sander to a vacuum cleaner, making your sanding experience easier, cleaner, and more efficient.
Attaching a sander to a vacuum cleaner is a simple process that can significantly reduce dust and debris during sanding. Follow these steps to attach a sander to a vacuum cleaner:
- Turn off both the sander and the vacuum cleaner.
- Attach the vacuum hose to the vacuum cleaner.
- Locate the dust collection port on the sander.
- Connect the other end of the vacuum hose to the dust collection port on the sander.
- Turn on both the sander and the vacuum cleaner.
- Adjust the vacuum suction to the desired level.
- Begin sanding with the sander and the vacuum cleaner will collect the dust and debris.

How to Attach Sander to Vacuum Cleaner?
If you’re someone who enjoys DIY projects, you know how important it is to have the right tools to get the job done. One of those tools is a sander, which can be incredibly useful for smoothing rough surfaces or removing old paint. However, sanding can create a lot of dust and debris, which can be harmful to your health and make a mess of your workspace. That’s where a vacuum cleaner comes in handy. In this article, we’ll show you how to attach a sander to a vacuum cleaner, so you can keep your workspace clean and safe.
Step 1: Check Compatibility
Before you start attaching your sander to your vacuum cleaner, you need to make sure they are compatible. Not all sanders and vacuum cleaners work together, so it’s important to check the manufacturer’s instructions for both tools. If your sander and vacuum cleaner are not compatible, you may need to purchase an adapter or a different type of sander or vacuum.
Once you’ve determined that your sander and vacuum cleaner are compatible, you can move on to the next step.
Step 2: Gather Materials
To attach your sander to your vacuum cleaner, you’ll need a few materials. These include:
- A sander
- A vacuum cleaner
- A hose
- An adapter (if necessary)
- A screwdriver (if necessary)
Make sure you have all of these materials before you start.
Step 3: Connect the Hose
The first step in attaching your sander to your vacuum cleaner is to connect the hose. You’ll need to attach one end of the hose to the sander and the other end to the vacuum cleaner. If your vacuum cleaner has a detachable hose, you may need to remove it first. Then, attach the hose to the port on your sander. Make sure it’s securely attached.
Next, attach the other end of the hose to the port on your vacuum cleaner. Again, make sure it’s securely attached.
Step 4: Test the Connection
Once you’ve connected the hose, it’s important to test the connection before you start sanding. Turn on your vacuum cleaner and your sander and make sure they are both working properly. Check to make sure the suction from the vacuum cleaner is strong enough to pick up the dust and debris from the sanding.
Step 5: Adjust the Settings
Before you start sanding, you’ll need to adjust the settings on your sander and your vacuum cleaner. You may need to adjust the suction on your vacuum cleaner to ensure it’s strong enough to pick up the dust and debris. You may also need to adjust the speed on your sander to match the type of surface you’re sanding.
Step 6: Start Sanding
Once you’ve adjusted the settings, you can start sanding. Make sure you’re wearing appropriate safety gear, such as goggles and a mask to protect your eyes and lungs from dust.
Step 7: Clean the Filter
After you’ve finished sanding, it’s important to clean the filter on your vacuum cleaner. Dust and debris can clog the filter, reducing its effectiveness. Follow the manufacturer’s instructions for cleaning the filter.
Step 8: Disconnect the Hose
When you’re finished sanding and cleaning the filter, it’s time to disconnect the hose. Turn off your sander and your vacuum cleaner and remove the hose from both tools. Make sure to store the hose and your tools in a safe place.
Step 9: Benefits of Using a Sander with a Vacuum Cleaner
Using a sander with a vacuum cleaner has several benefits. It can help keep your workspace clean and safe by removing dust and debris. It can also make the sanding process more efficient by reducing the amount of time you need to spend cleaning up afterwards.
Step 10: Conclusion
Attaching a sander to a vacuum cleaner is relatively simple and can make your DIY projects more efficient and safe. By following these steps, you can ensure that your sander and vacuum cleaner are properly connected and working together to keep your workspace clean and dust-free.
Frequently Asked Questions
Here are some frequently asked questions and answers about how to attach a sander to a vacuum cleaner:
How do I attach a sander to a vacuum cleaner?
Attaching a sander to a vacuum cleaner is a fairly simple process. First, make sure the sander and vacuum cleaner are compatible. Then, connect the hose from the vacuum cleaner to the outlet on the sander. Make sure the hose is securely attached, and turn on the vacuum cleaner to ensure it is working properly. You may need to adjust the suction on the vacuum cleaner to ensure it is picking up all the dust and debris.
It is important to attach a vacuum cleaner to a sander to reduce the amount of dust and debris that is created during sanding. This not only keeps your work area cleaner, but it also reduces the risk of breathing in harmful particles.
What type of vacuum cleaner should I use for sanding?
When it comes to sanding, it is best to use a vacuum cleaner with a strong suction power and a HEPA filter. A HEPA filter can capture small particles, such as dust and allergens, and prevent them from being released back into the air. It is also important to choose a vacuum cleaner with a hose that is compatible with your sander. This will ensure that the vacuum cleaner is able to effectively pick up all the dust and debris created during sanding.
Additionally, it is recommended to use a vacuum cleaner with a long hose or a hose extension. This will make it easier to reach all areas of your work surface and ensure that you are able to effectively clean up all the dust and debris.
Can I use any vacuum cleaner with a sander?
No, not all vacuum cleaners are suitable for use with a sander. It is important to choose a vacuum cleaner with a hose that is compatible with your sander. This will ensure that the vacuum cleaner is able to effectively pick up all the dust and debris created during sanding. Additionally, it is recommended to use a vacuum cleaner with a strong suction power and a HEPA filter to capture small particles.
Using a vacuum cleaner that is not compatible with your sander or does not have a strong suction power may result in poor dust collection and an ineffective cleaning process. This can lead to a messy work area and an increased risk of breathing in harmful particles.
Are there any safety precautions I should take when attaching a sander to a vacuum cleaner?
Yes, there are some safety precautions you should take when attaching a sander to a vacuum cleaner. First, make sure the vacuum cleaner is turned off and unplugged before attaching it to the sander. This will prevent any electrical accidents from occurring.
Additionally, make sure the hose is securely attached to both the sander and the vacuum cleaner before turning on the vacuum cleaner. This will help prevent any dust or debris from escaping and ensure that the cleaning process is effective.
How often should I clean my vacuum cleaner when using it with a sander?
When using a vacuum cleaner with a sander, it is important to clean it regularly to ensure it continues to work effectively. How often you clean your vacuum cleaner will depend on how frequently you use it and how much dust and debris it collects.
It is recommended to empty the vacuum cleaner’s dust bin or replace the vacuum cleaner bag after every use when using it with a sander. Additionally, you should clean the vacuum cleaner’s filter regularly to prevent it from becoming clogged with dust and debris.
How to Sand Indoors – NO DUST!
In conclusion, attaching a sander to a vacuum cleaner is a practical and efficient solution for keeping your workspace clean and free from dust. With just a few simple steps, you can easily connect your sander to your vacuum cleaner and enjoy a cleaner and healthier work environment.
Not only does this method save time and energy, but it also helps to improve the lifespan of your sander by reducing the amount of dust and debris that can accumulate in its motor.
By following the steps outlined in this article, you can quickly and easily attach your sander to your vacuum cleaner and enjoy a more comfortable and productive work experience. So, why not give it a try and see the difference it can make for yourself?

