Are you experiencing muffled audio or distorted sounds during phone calls, recordings, or voice memos on your iPhone? It could be due to a dirty microphone. But don’t worry, cleaning your iPhone’s microphone is easy and can be done in a matter of minutes.
In this article, we will guide you through the steps to clean your iPhone’s microphone, including the tools you’ll need and the precautions you should take. Whether you are a professional who relies on their iPhone’s microphone for work or just someone who wants to improve their audio quality, this guide is for you. So, let’s get started and bring back the crystal-clear sound to your iPhone!
If you’re having trouble with the sound quality during phone calls or while recording videos on your iPhone, it may be time to clean the microphone. Here’s how to clean the microphone on your iPhone in a few simple steps:
1. Turn off your iPhone and remove any protective casing.
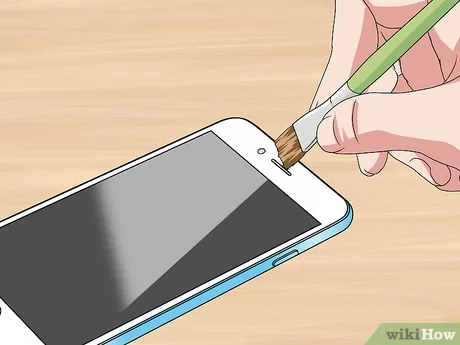
2. Use a soft-bristled toothbrush or a clean, dry cloth to gently brush or wipe away any dirt or debris from the microphone.
3. For stubborn grime, use a toothpick or a dry cotton swab to carefully scrape away the dirt.
4. Finally, blow into the microphone to remove any remaining dust or debris.
By following these steps, you should be able to restore the sound quality on your iPhone.

How to Clean Microphone on iPhone?
Do you experience muffled or unclear audio during phone calls or recording using your iPhone? It might be time to clean your microphone. Dirt, dust, and debris can easily accumulate on the microphone, resulting in poor audio quality. Fortunately, cleaning your iPhone’s microphone is a simple process that you can do yourself. In this article, we will guide you through the steps to clean the microphone on your iPhone.
Why Clean Your iPhone Microphone?
Your iPhone’s microphone is a crucial component that enables you to make phone calls, record audio, dictate voice commands, and more. When the microphone becomes dirty, it can significantly impact the audio quality, making it difficult for the other person to hear you clearly. Dirt, dust, and debris can accumulate on the microphone’s opening, blocking sound waves from entering and exiting, resulting in muffled or distorted audio. Cleaning your iPhone’s microphone can help restore the audio quality and ensure that it functions correctly.
To clean your iPhone’s microphone, you do not need any special tools or equipment. You can use simple household items that are readily available to clean the microphone.
How to Clean Your iPhone Microphone?
Here are the steps to clean your iPhone’s microphone:
Step 1: Turn off your iPhone and remove any protective case or cover.
Step 2: Locate the microphone opening. On the iPhone 7 and later models, you can find the microphone opening near the speaker grille at the bottom edge of the phone. On older models, such as the iPhone 6, the microphone opening is located next to the headphone jack.
Step 3: Use a soft-bristled toothbrush or a clean, dry toothbrush to remove any visible debris or dust from the microphone opening. Be gentle and avoid applying too much pressure as it can damage the microphone.
Step 4: If there is still visible dirt or grime, use a cotton swab or a toothpick to carefully remove it. Be cautious not to push the dirt further into the opening.
Step 5: You can also use a can of compressed air to blow out any remaining debris or dust from the microphone opening. Hold the can upright and spray from a distance of 6 inches away from the phone.
Step 6: Finally, wipe the microphone opening with a soft, lint-free cloth to remove any remaining dirt or debris.
Benefits of Cleaning Your iPhone Microphone
Cleaning your iPhone’s microphone can have several benefits, including:
Better Audio Quality: Cleaning your iPhone’s microphone can help restore the audio quality, making it easier for the other person to hear you during phone calls or recording.
Improved Phone Performance: A clean microphone can help improve the overall performance of your phone, ensuring that it functions correctly.
Prevent Future Damage: Regularly cleaning your iPhone’s microphone can help prevent future damage, such as corrosion or rust, that can occur due to the accumulation of dirt or debris.
Cleaning Your iPhone Microphone Vs. Professional Cleaning
While cleaning your iPhone’s microphone is a simple process that you can do yourself, there are instances where professional cleaning might be necessary. If your microphone has significant damage or corrosion, it might require a professional cleaning to restore it to its original condition. Additionally, if you are not confident in cleaning your iPhone’s microphone, you can always take it to a professional technician who can clean it for you.
Conclusion
Cleaning your iPhone’s microphone is a simple process that can significantly improve the audio quality and overall performance of your phone. By following the steps outlined in this article, you can easily clean your iPhone’s microphone using simple household items. Regularly cleaning your iPhone’s microphone can help prevent future damage and ensure that it functions correctly.
Frequently Asked Questions
Microphones are essential in our day-to-day life, especially in today’s virtual world. However, dirty microphones can affect the quality of sound and cause audio problems. Cleaning your iPhone’s microphone is a simple process, but it requires some care. Here are some frequently asked questions about how to clean the microphone on the iPhone.
What materials do I need to clean my iPhone’s microphone?
Cleaning your iPhone’s microphone requires a few materials that are readily available in your home or at the store. You will need a soft-bristled toothbrush, a microfiber cloth, a can of compressed air, and a cleaning solution such as rubbing alcohol or lens cleaner. These materials are essential for cleaning the microphone without damaging it.
Before cleaning, ensure that your iPhone is turned off to avoid any damage to the device. Also, make sure that your hands are clean and dry to prevent any moisture from entering the device when cleaning the microphone.
How do I clean the microphone on my iPhone?
Cleaning the microphone on your iPhone is a simple process that requires some care. Start by using the soft-bristled toothbrush to gently brush the microphone opening. This will remove any visible dirt or dust particles. Next, use the microfiber cloth to wipe the microphone opening gently. If there is still dirt or debris, use a can of compressed air to blow it away. Do not use too much pressure, as this may damage the microphone.
You can also use a cleaning solution such as rubbing alcohol or lens cleaner to clean the microphone. Dampen a cotton swab with the cleaning solution and gently wipe the microphone opening. Finally, allow the microphone to dry before turning on your iPhone.
How often should I clean my iPhone’s microphone?
It is essential to keep your iPhone’s microphone clean to ensure that it functions correctly. How often you clean your iPhone’s microphone depends on the environment you use it in. If you use your iPhone in a dusty or dirty environment, you may need to clean the microphone more often. However, if you use your iPhone in a clean environment, you may only need to clean the microphone occasionally.
As a general rule, it is best to clean your iPhone’s microphone every few weeks to ensure that it is free from dirt and debris. This will help to maintain the quality of sound and prevent any potential audio problems.
What should I do if my iPhone’s microphone still isn’t working after cleaning?
If your iPhone’s microphone is still not working correctly after cleaning, there may be an underlying issue that requires professional assistance. In this case, it is best to take your iPhone to an authorized service center for diagnosis and repair.
It is essential to avoid attempting to fix the microphone yourself or using any unapproved cleaning solutions, as this may cause further damage to the device. Remember to always take care when cleaning your iPhone’s microphone and follow the manufacturer’s instructions.
Can I use water to clean my iPhone’s microphone?
No, you should never use water to clean your iPhone’s microphone. Water can damage the microphone and other internal components of the device. Instead, use a cleaning solution such as rubbing alcohol or lens cleaner to clean the microphone. These solutions are safe to use and will not damage the device.
Remember always to follow the manufacturer’s instructions when cleaning your iPhone’s microphone and to take care to avoid damaging the device. With proper care and maintenance, you can ensure that your iPhone’s microphone functions correctly and produces high-quality sound.
How to Properly Clean Your iPhone Speakers /Mic & Lightning Port
In conclusion, cleaning your iPhone microphone is an essential task that should not be overlooked. By following the simple steps outlined in this article, you can ensure that your microphone is free from debris and dirt, providing you with clear and crisp sound quality.
Firstly, it is essential to turn off your iPhone and remove the case before cleaning the microphone. This will prevent any damage to your device and ensure that you can access the microphone easily.
Secondly, using a soft-bristled brush, gently remove any visible debris from the microphone. Be sure to use a light touch to avoid damaging the microphone.
Finally, using a cotton swab dipped in rubbing alcohol, gently wipe the microphone to remove any remaining dirt or grime. Allow the microphone to dry completely before turning your iPhone back on.
By following these simple steps, you can maintain the sound quality of your iPhone and ensure that your microphone is free from debris and dirt. Remember to clean your microphone regularly to prevent any build-up of dirt and to keep your iPhone functioning at its best.