
Are you tired of your Kirby vacuum cleaner not performing as well as it used to? The culprit could be a worn out belt. Replacing the belt is a simple and easy process that can be done at home, saving you time and money. In this article, we will walk you through the step-by-step process of how to replace a belt on a Kirby vacuum cleaner.
With just a few tools and some basic knowledge, you can have your Kirby vacuum cleaner running like new again. Don’t let a worn out belt get in the way of a clean home. Follow our guide and you’ll be back to cleaning in no time. So, let’s dive in and learn how to replace the belt on your Kirby vacuum cleaner.
- Unplug the vacuum and turn it over to expose the brush roll.
- Remove the bottom plate by unscrewing it with a screwdriver.
- Take out the old belt and clean the brush roll and motor shaft if necessary.
- Place the new belt over the motor shaft and slide it onto the brush roll.
- Rotate the brush roll a few times to ensure the belt is properly in place.
- Replace the bottom plate and screw it back in.
How to Replace a Belt on a Kirby Vacuum Cleaner?
Kirby vacuum cleaners are known for their powerful suction and durability. However, like any other vacuum cleaner, a Kirby also requires regular maintenance, including replacing the belt. The belt is an essential component of the vacuum cleaner that drives the brush roll, which is responsible for picking up dirt and debris from carpets and floors. Over time, the belt can become worn or broken, leading to reduced suction and poor cleaning performance. In this article, we will discuss how to replace the belt on a Kirby vacuum cleaner in easy steps.
Step 1: Gather the necessary tools
Before you begin, you will need to gather a few tools. You will need a new Kirby belt, a screwdriver, a pair of scissors, and a clean cloth. You can buy Kirby belts from any Kirby dealer or a reputable online store.
Step 2: Unplug the vacuum cleaner
The first thing you need to do is unplug the vacuum cleaner from the power source. This is essential to prevent any accidents from happening during the belt replacement process.
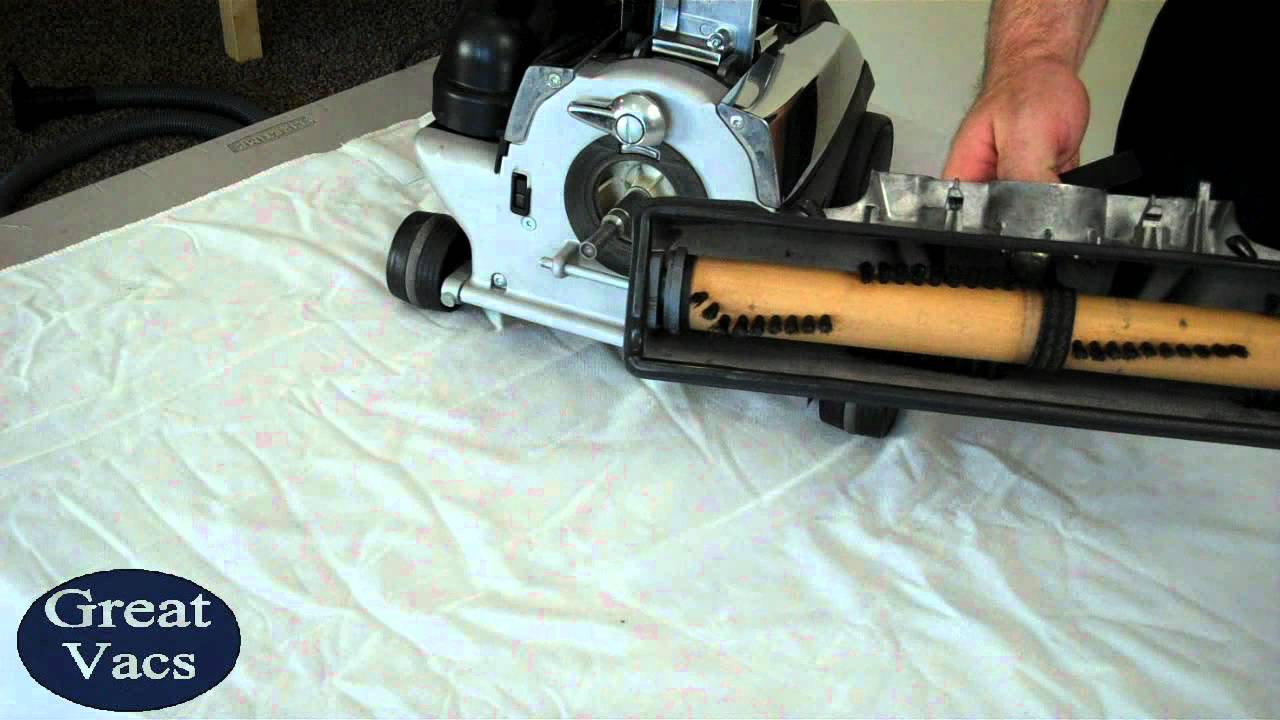
Step 3: Remove the nozzle head
Next, you need to remove the nozzle head from the vacuum cleaner. To do this, flip the head over and locate the belt cover. Using the screwdriver, unscrew the belt cover and remove it. You will now be able to see the belt and brush roll.
Step 4: Remove the old belt
Using the scissors, carefully cut the old belt and remove it from the brush roll and motor shaft. If the belt is broken, you can simply remove it without cutting it.
Step 5: Install the new belt
Take the new Kirby belt and loop it around the brush roll. Next, loop the other end of the belt around the motor shaft. You may need to use the screwdriver to help you guide the belt onto the motor shaft.
Step 6: Check the belt tension
Once you have installed the new belt, check the tension by gently tugging on the brush roll. The belt should be tight but not too tight. If the belt is too tight or too loose, adjust it accordingly by moving the brush roll.
Step 7: Reassemble the nozzle head
Once you are satisfied with the belt tension, reassemble the nozzle head by screwing the belt cover back on. Make sure it is secured tightly to prevent the belt from slipping off during use.
Step 8: Clean the vacuum cleaner
Before you start using the vacuum cleaner, clean the brush roll and the nozzle head using a clean cloth. This will help remove any debris or dust that may have accumulated during the belt replacement process.
Step 9: Test the vacuum cleaner
Finally, plug the vacuum cleaner back in and turn it on to test it. The brush roll should be spinning smoothly, and the suction should be strong. If you notice any issues, recheck the belt tension and reassemble the nozzle head.
Step 10: Benefits of replacing the belt
Replacing the belt on your Kirby vacuum cleaner regularly has many benefits. It ensures that the vacuum cleaner performs at its best, picking up dirt and debris effectively. It also helps prevent the belt from breaking or slipping off during use, which can cause damage to the vacuum cleaner. Additionally, replacing the belt regularly can help prolong the life of the vacuum cleaner, saving you money on repairs or replacements.
In conclusion, replacing the belt on a Kirby vacuum cleaner is a simple and straightforward process that can be done at home with the right tools and instructions. By following the above steps, you can ensure that your Kirby vacuum cleaner performs at its best and lasts for many years to come.
Frequently Asked Questions
In this section, you will find the most common questions related to replacing a belt on a Kirby vacuum cleaner. These answers will help you to understand the process and make it easier for you to do it yourself.
Q: How do I know when to replace the belt on my Kirby vacuum cleaner?
The belt on your Kirby vacuum cleaner needs to be replaced when it starts to show signs of wear and tear. You may notice that the vacuum is not picking up dirt and debris as effectively as it used to, or you may hear a loud, high-pitched noise when you turn it on. These are indicators that the belt needs to be replaced.
To check the belt, turn off the vacuum cleaner and unplug it from the wall. Turn the vacuum cleaner over and remove the bottom plate. The belt should be stretched taut between the motor shaft and the brush roll. If it is loose, frayed or broken, it needs to be replaced.
Q: What tools will I need to replace the belt on my Kirby vacuum cleaner?
To replace the belt on your Kirby vacuum cleaner, you will need a new belt, a screwdriver, and a pair of scissors. You can purchase a replacement belt from a Kirby dealer or an authorized retailer. The screwdriver will be used to remove the screws that hold the bottom plate in place, and the scissors will be used to cut the old belt off the brush roll.
It is important to use the correct belt for your specific Kirby model. Using the wrong belt can cause the vacuum cleaner to not function properly and may even damage the machine.
Q: How do I remove the old belt on my Kirby vacuum cleaner?
To remove the old belt on your Kirby vacuum cleaner, you will need to turn the vacuum over and remove the bottom plate. Once the bottom plate is removed, you will see the brush roll and the old belt. Use a pair of scissors to cut the old belt off the brush roll. Be careful not to damage the brush roll or any other parts of the vacuum cleaner.
After removing the old belt, stretch the new belt around the motor shaft and then around the brush roll. Make sure the belt is taut and properly aligned before replacing the bottom plate.
Q: How do I replace the belt on my Kirby vacuum cleaner?
To replace the belt on your Kirby vacuum cleaner, you will need to turn the vacuum over and remove the bottom plate. Once the bottom plate is removed, you will see the brush roll and the old belt. Use a pair of scissors to cut the old belt off the brush roll. Be careful not to damage the brush roll or any other parts of the vacuum cleaner.
After removing the old belt, stretch the new belt around the motor shaft and then around the brush roll. Make sure the belt is taut and properly aligned before replacing the bottom plate. Finally, replace the screws that hold the bottom plate in place and test the vacuum cleaner to make sure it is working properly.
Q: Can I replace the belt on my Kirby vacuum cleaner myself?
Yes, you can replace the belt on your Kirby vacuum cleaner yourself. It is a simple process that can be done in just a few minutes with the right tools and a little bit of know-how. However, if you are not comfortable doing it yourself, you can always take your vacuum cleaner to a Kirby dealer or an authorized retailer to have it serviced.
Replacing the belt on your Kirby vacuum cleaner is an important part of maintaining the machine and keeping it running smoothly. By doing it yourself, you can save time and money while ensuring that your vacuum cleaner is working at its best.
How to replace the belt in a Kirby vacuum cleaner
In conclusion, replacing a belt on a Kirby vacuum cleaner is a simple process that can be done at home with a few basic tools. By following the steps outlined in this guide, you can ensure that your vacuum cleaner is in top working condition and ready to tackle even the toughest cleaning jobs.
First, gather your tools and remove the old belt from the vacuum cleaner. Next, install the new belt according to the manufacturer’s instructions, making sure that it is properly aligned and tightened. Finally, test the vacuum cleaner to ensure that the new belt is working properly and that your cleaning efforts will be successful.
With these simple steps, you can easily replace the belt on your Kirby vacuum cleaner and ensure that it is working at peak performance. So why wait? Get started today and enjoy a cleaner, more efficient home with your newly repaired Kirby vacuum cleaner.