Are you looking for the best way to clean your crankshaft? The crankshaft is a crucial component of any engine and its proper maintenance is essential in order to ensure the engine runs smoothly. Cleaning a crankshaft correctly is not difficult but it does require some patience and attention to detail. In this article, we will walk you through the steps and provide some useful tips on how to clean a crankshaft effectively.
Cleaning a crankshaft is an important part of engine maintenance. Here is a step-by-step guide on how to clean a crankshaft:
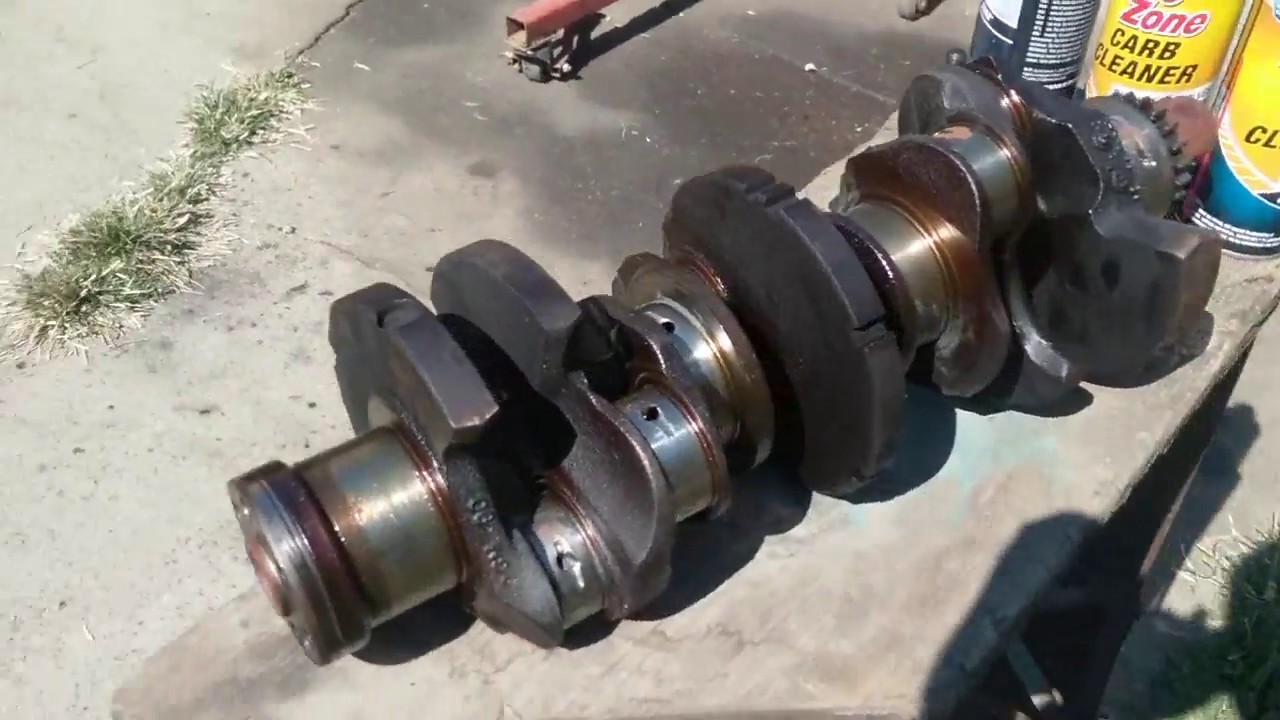
- Remove the crankshaft from the engine.
- Use a wire brush to remove dirt and debris.
- Inspect the crankshaft for signs of wear and tear.
- Use a degreaser or solvents to clean the crankshaft.
- Use a soft cloth to dry the crankshaft.
- Replace any worn or damaged parts.
- Reinstall the crankshaft in the engine.
How to Clean a Crankshaft?
Cleaning a crankshaft is a vital part of any engine rebuild. Cleaning a crankshaft will help to ensure that the crankshaft is free of any dirt, debris, or rust which could cause wear and tear on the bearing surfaces or even cause damage to the crankshaft itself. This article will provide a step-by-step guide on how to clean a crankshaft in order to prepare it for engine installation.
Step 1: Disassembling the Crankshaft
The first step in cleaning a crankshaft is to disassemble it. This involves removing all components such as the flywheel, connecting rods, pistons, and other components that are attached to the crankshaft. It is important to do this in a slow and methodical manner in order to avoid any damage to the crankshaft itself. Once all components have been removed, the crankshaft should be carefully inspected for any signs of damage or wear.
Step 2: Cleaning the Crankshaft
Once the crankshaft has been disassembled and inspected, it is time to start the cleaning process. The most common method of cleaning a crankshaft is to use a wire brush and a degreasing solution. A wire brush should be used to remove any dirt, debris, or rust that is present on the surface of the crankshaft. If necessary, a degreasing solution can be used to help loosen and remove any stubborn dirt or debris.
Step 3: Inspecting the Crankshaft
After cleaning the crankshaft, it is important to inspect it for any signs of damage or wear. The crankshaft should be carefully examined for any signs of cracks, corrosion, or other signs of damage. If any damage is detected, it is important to replace the crankshaft before installing it into the engine block.
Step 4: Applying Lubrication
Once the crankshaft has been inspected and cleaned, it is time to apply lubrication to the bearing surfaces. This is important as it will help to reduce wear and tear on the crankshaft and ensure that it is properly lubricated for the engine to run smoothly. When applying lubrication, it is important to ensure that it is applied evenly and that it is not applied too heavily.
Step 5: Reassembling the Crankshaft
Once the crankshaft has been inspected and lubricated, it is time to reassemble it. This involves reattaching all components such as the flywheel, connecting rods, and pistons. It is important to ensure that all components are tightened to the correct torque settings and that all seals are properly installed.
Step 6: Installing the Crankshaft
The final step in cleaning a crankshaft is to install it into the engine block. This involves ensuring that the crankshaft is properly aligned and that all bearing surfaces are properly lubricated. It is important to ensure that the crankshaft is installed correctly as incorrect installation can lead to engine damage and premature wear.
Step 7: Testing the Crankshaft
Once the crankshaft is installed, it is important to test it to ensure that it is properly functioning. This is done by running the engine and monitoring the crankshaft for any signs of vibration or other issues. If any issues are detected, it is important to address them before continuing to use the engine.
Step 8: Replacing Worn Parts
If any components of the crankshaft are worn or damaged, it is important to replace them before continuing to use the engine. This includes any bearings, seals, or other components that may be worn or damaged. It is important to ensure that these components are replaced with high-quality parts that are designed to meet the specifications of the engine.
Step 9: Checking Clearances
Once all components of the crankshaft have been replaced, it is important to check the clearances between the crankshaft and all other components. This is done by measuring the gaps between the crankshaft and the components and ensuring that they are within the recommended specifications. This is important as incorrect clearances can lead to premature wear and even engine failure.
Step 10: Finishing Touches
The final step in cleaning a crankshaft is to finish it off with any final touches. This includes cleaning the crankshaft and all components with a clean cloth and applying any protective coating that may be necessary. It is important to ensure that all components are properly lubricated and that the crankshaft is installed correctly before using the engine.
Frequently Asked Questions
What is a Crankshaft?
A crankshaft is a rotating shaft which converts reciprocating motion of the pistons into rotational motion. It is an essential component in internal combustion engines, providing the force necessary to turn the crankshaft, which in turn moves the engine’s other components.
The crankshaft is the heart of the engine, and it needs to be kept clean and free of dirt and debris to maintain its performance.
How do I Clean a Crankshaft?
The first step in cleaning a crankshaft is to remove any dirt and debris from the surface. This can be done by using a wire brush or a scrubber to scrub the surface clean. Once all of the dirt and debris is removed, the crankshaft should be rinsed with a water-dampened cloth to remove any remaining debris.
Once the crankshaft is rinsed, it should be dried thoroughly with a clean, dry cloth. This will help ensure that no dirt or debris will remain on the crankshaft after it is cleaned. Finally, the crankshaft should be lubricated with a high-quality motor oil to help protect it from dirt and wear.
What Materials are Needed to Clean a Crankshaft?
To clean a crankshaft, you will need a wire brush or scrubber, a damp cloth, a clean, dry cloth, and a high-quality motor oil. These materials will help you effectively clean the crankshaft and protect it from dirt and wear.
How Often Should a Crankshaft be Cleaned?
It is recommended that a crankshaft be cleaned every 10,000 miles to maintain optimal performance. This will help ensure that the crankshaft is free of dirt and debris, which can cause wear and tear on the engine.
What Are the Benefits of Cleaning a Crankshaft?
Cleaning a crankshaft regularly can help ensure that the engine is running efficiently and effectively. A clean crankshaft will reduce friction and wear, which can lead to better performance and extended engine life. Additionally, a clean crankshaft will help reduce emissions, which is beneficial for both the environment and your wallet.
How To Polish Your Crank Journals
In conclusion, cleaning a crankshaft is not a difficult task if you have the right tools and knowledge. By following the steps outlined in this article, you can ensure that your crankshaft is clean and free of dirt, grime, and other debris. With a little bit of patience and effort, you can have your crankshaft looking like new in no time.
