
Cleaning a grease trap is an important part of maintaining a healthy plumbing system. Grease traps are designed to prevent the buildup of fats, oils and grease from entering the sewer system, which can lead to clogs and other plumbing issues. In this article, we’ll look at how to clean a grease trap and why it’s important to do it correctly. Read on to learn more about this important step in plumbing maintenance.
Cleaning a grease trap is essential for the proper functioning of your plumbing system. Here are the steps to follow for a thorough clean:
- Put on protective gear such as gloves and a face mask.
- Scoop out the solid material from the trap using a slotted spoon.
- Thoroughly rinse the solid material by running hot water through the trap.
- Mix a solution of hot water and a degreaser and pour it into the trap.
- Allow the solution to sit for 30 minutes.
- Flush the trap with hot water several times.
- Empty the trap and rinse with hot water.
- Use a wire brush to scrub the inside surfaces of the trap.
- Rinse the trap with hot water.
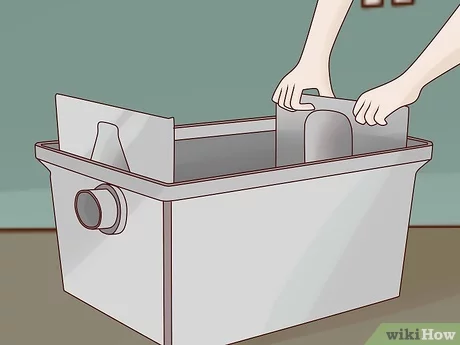
- Replace the trap cover and restore power to the area.
language
What is a Grease Trap?
A grease trap, also known as a grease interceptor, is an important part of a plumbing system. It is a device that is installed on the outlet of sinks, toilets, and other fixtures that have a high potential to create a build-up of fats, oils, and greases. It is designed to capture these materials before they can enter the sewage system and cause blockages.
Grease traps are primarily used in commercial kitchens and restaurants, but they can also be used in residential settings. They are designed to hold the grease and oils that enter the drainage system, preventing them from clogging up pipes. Grease traps also help to reduce the amount of solids entering the sewage system, which can help reduce the cost of sewage treatment and disposal.
Why Clean a Grease Trap?
When grease and oil are not removed from a grease trap, they can accumulate and create a sludge-like material. This sludge is a breeding ground for bacteria, and if left unchecked, it can cause a foul smell, as well as clog pipes and reduce the efficiency of the drainage system.
Regularly cleaning a grease trap will not only help prevent these unpleasant problems, but it will also help to extend the life of the grease trap. Cleaning a grease trap also helps to reduce the amount of solids entering the sewage system, which will help to reduce the cost of sewage treatment and disposal.
How to Clean a Grease Trap?
Step 1: Prepare the Grease Trap
Before you begin the cleaning process, it is important to prepare the grease trap for cleaning. This includes emptying out any large solid materials, such as food scraps, that may have been trapped in the grease trap. It is also important to make sure that any access ports or covers are clean and in good condition.
Step 2: Remove the Grease
Once the grease trap has been prepared, the next step is to remove the grease. This can be done using a special grease-removing solution that is designed to break down the grease. You can also use a combination of hot water and a degreasing agent to help break down the grease.
Step 3: Clean the Grease Trap
Once the grease has been removed, it is important to thoroughly clean the grease trap. This can be done by using an approved cleaning solution that is designed to remove any residue from the grease trap. You should use a brush to scrub the interior of the trap, and make sure to rinse it thoroughly with clean water.
Step 4: Sanitize the Grease Trap
Once the grease trap has been cleaned and rinsed, it is important to sanitize the trap. This can be done using an approved sanitizing solution, or by using a combination of hot water and bleach. It is important to make sure that the sanitizing solution is thoroughly mixed, and that it is allowed to sit in the grease trap for at least 10 minutes.
Step 5: Dispose of the Grease and Waste
Once the grease trap has been cleaned and sanitized, the next step is to dispose of the grease and waste. This should be done in accordance with local regulations, and it is important to make sure that the grease and waste is disposed of properly.
Step 6: Test the Grease Trap
Once the grease trap has been cleaned, sanitized, and the grease and waste have been disposed of, it is important to test the grease trap for any leaks or clogs. This can be done by running water through the trap and checking for any signs of leakage or clogs.
Step 7: Monitor the Grease Trap
Once the grease trap has been tested and is functioning properly, it is important to monitor it regularly for any build-up of grease or solids. This can be done by checking the grease trap on a regular basis and emptying it when necessary.
Step 8: Maintain the Grease Trap
In order to ensure that the grease trap is functioning properly, it is important to maintain it on a regular basis. This includes checking the trap for any signs of wear and tear, and replacing any broken or damaged parts. It is also important to make sure the trap is cleaned and maintained on a regular basis.
Step 9: Unclog the Grease Trap
If the grease trap becomes clogged, it is important to unclog it as soon as possible. This can be done using a plunger, or a combination of hot water and a degreasing agent. It is important to make sure that the clog is completely cleared before using the grease trap again.
Step 10: Prevent Grease Build-Up
The last step in cleaning a grease trap is to prevent grease build-up. This can be done by ensuring that the grease trap is emptied on a regular basis and that any debris or solids are removed before they can accumulate. It is also important to make sure that all access ports or covers are securely fastened to prevent any grease from entering the sewage system.
Related Faq
What is a Grease Trap?
A grease trap is a plumbing device used to trap fats, oils, and grease (FOG) that have been washed down the sink. It helps prevent the FOG from entering the sewer system and causing blockages. The grease trap is installed between the kitchen sink and the sewer line, and it works by allowing the water to pass through but trapping the FOG in a container. The FOG can then be removed on a regular basis to prevent clogs and other plumbing issues.
The size of a grease trap can vary widely, depending on the size of the kitchen and the amount of FOG that is produced. It is important to have the right size grease trap to ensure that it is effective in trapping the FOG.
How Often Should a Grease Trap be Cleaned?
It is recommended that grease traps be cleaned every three to six months, depending on the amount of FOG that is produced. If the grease trap is not cleaned regularly, it can become clogged with FOG and prevent water from passing through. This can lead to backups and other plumbing issues.
In addition to regular cleaning, it is important to inspect the grease trap regularly for signs of FOG buildup. If the trap appears to be clogged, it should be cleaned as soon as possible to prevent further problems. If the FOG buildup is severe, it may be necessary to have a professional clean the trap.
What Tools Are Needed to Clean a Grease Trap?
The basic tools needed to clean a grease trap include a bucket, a drain snake, a pair of rubber gloves, and a cleaning solution. The bucket can be used to collect the FOG that is removed from the trap, while the snake can be used to break up any clogs and remove any FOG that is stuck in the trap. The gloves should be worn to protect your hands from the FOG, and the cleaning solution can be used to break down the FOG and make it easier to remove from the trap.
It is also important to have the right safety equipment, such as eye protection and a respirator, when cleaning a grease trap. This will help to protect you from any fumes or particles that may be released during the cleaning process.
How to Clean a Grease Trap?
The first step in cleaning a grease trap is to remove the lid and inspect the interior of the trap. Check for any signs of FOG buildup, and use the drain snake to break up any clogs. Once the FOG is broken up, use a bucket to scoop out the FOG and dispose of it.
Next, use a cleaning solution to break down the remaining FOG and make it easier to remove. Once the FOG has been removed, use a hose to flush out the trap and rinse away any remaining FOG. Finally, replace the lid and check for any signs of leakage.
What Steps Should be Taken to Prevent Grease Trap Clogs?
To prevent grease trap clogs, it is important to avoid pouring fats, oils, and grease down the sink. These should be disposed of in a separate container and taken to a recycling center. It is also important to have the grease trap cleaned regularly to ensure that it is working properly.
In addition, it is a good idea to install a grease filter or grease separator in the kitchen sink. This will help to trap any FOG that is washed down the sink and prevent it from entering the grease trap. It is also important to inspect the filter or separator regularly to ensure that it is working properly.
Can a Grease Trap be Overfilled?
Yes, a grease trap can be overfilled. If the trap is not cleaned regularly, the FOG can accumulate and eventually cause the trap to become clogged. This can lead to backups and other plumbing issues.
To prevent the grease trap from becoming overfilled, it is important to clean it regularly. This will help to ensure that the trap is working properly and that any FOG that is produced is being trapped and removed. It is also important to inspect the trap regularly for signs of FOG buildup, and to have it cleaned if necessary.
DIRTY JOBS How to Clean out a Grease Trap Restaurant Food Video on what an interceptor looks like
Cleaning your grease trap is an important part of keeping your plumbing system and kitchen running smoothly. With regular maintenance and cleaning, you can avoid any costly problems that may arise from clogged or blocked pipes. By following the steps outlined above, you can easily clean your grease trap yourself and keep it running efficiently.