When your car’s engine starts to sputter, the culprit is often a dirty or faulty distributor cap. Located on top of the engine, the distributor cap is responsible for distributing high voltage sparks to the spark plugs in the correct firing order. Over time, the cap can become coated in grime and debris, which affects its ability to function properly. But fear not, cleaning the distributor cap is a simple task that can be done at home with just a few tools and some elbow grease. In this article, we’ll walk you through the steps to get your distributor cap clean and your engine running smoothly once again.
If you’re having trouble starting your car or it’s misfiring, it could be due to a dirty distributor cap. To clean it, first, remove the cap from the distributor and use a clean rag to wipe away any debris. Then, use a fine-grit sandpaper to gently sand away any corrosion on the inside and outside of the cap. Finally, use a clean rag to wipe away any remaining debris and reattach the cap to the distributor.
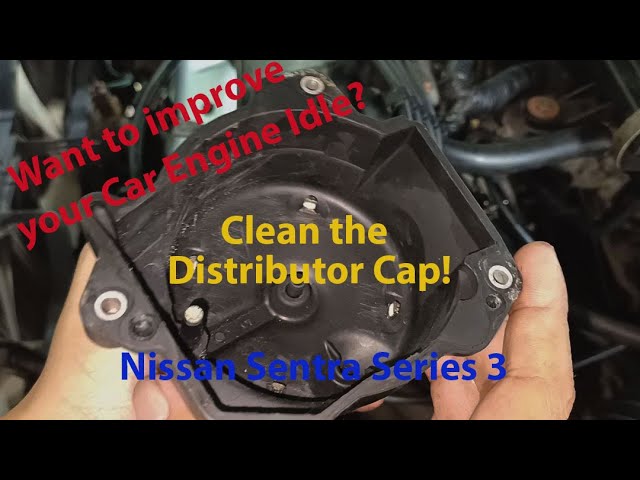
How to Clean Distributor Cap?
A distributor cap is a vital component in the ignition system of a vehicle. It distributes the high voltage from the ignition coil to the spark plugs in the correct firing order. Over time, the distributor cap can become dirty or corroded, which can cause misfires or even engine failure. Here are the steps to clean a distributor cap.
Step 1: Safety First
Before starting the cleaning process, it is important to ensure that the engine is turned off and the key is removed from the ignition. This will prevent any accidental starting of the engine while you are working on it.
Step 1.1: Disconnect the Battery
To be extra cautious, you can disconnect the battery before starting the cleaning process. This will prevent any accidental electrical shock or damage to the electrical system of your vehicle.
Step 2: Remove the Distributor Cap
Locate the distributor cap on the engine and remove it. The cap is usually held in place by a few screws or clips. Once the cap is removed, inspect it for any signs of wear or damage.
Step 2.1: Inspect the Distributor Cap
Check the inside of the distributor cap for any signs of carbon buildup or corrosion. If the cap is severely corroded, it may need to be replaced instead of cleaned.
Step 3: Clean the Distributor Cap
Using a clean cloth, wipe the inside of the distributor cap to remove any dirt or debris. If there is any carbon buildup or corrosion, you can use a small wire brush or sandpaper to gently remove it. Be careful not to damage the contacts or any other parts of the cap.
Step 3.1: Use a Contact Cleaner
You can also use a contact cleaner to clean the inside of the distributor cap. Spray a small amount of contact cleaner onto a clean cloth and wipe the inside of the cap. This will remove any dirt, debris, or corrosion and ensure that the cap is clean and free from any electrical resistance.
Step 4: Reinstall the Distributor Cap
Once the distributor cap is clean, reinstall it onto the engine. Make sure that it is securely fastened and that all the wires are connected properly. You can also apply a small amount of dielectric grease to the contacts to ensure a good electrical connection.
Step 4.1: Test the Ignition System
After reinstalling the distributor cap, start the engine and check the ignition system for any misfires or other problems. If the engine runs smoothly and there are no misfires, then the cleaning process was successful.
Step 5: Regular Maintenance
To prevent the distributor cap from becoming dirty or corroded in the future, it is important to perform regular maintenance on your vehicle. This includes changing the spark plugs and wires, as well as inspecting the distributor cap for any signs of wear or damage.
Step 5.1: Benefits of Regular Maintenance
Performing regular maintenance on your vehicle will ensure that it runs smoothly and efficiently, and that you avoid costly repairs in the future. It will also improve the performance of your engine and increase its lifespan.
In conclusion, cleaning a distributor cap is a simple and easy process that can be done at home with just a few tools. By following these steps and performing regular maintenance on your vehicle, you can ensure that your engine runs smoothly and efficiently for years to come.
Frequently Asked Questions
Cleaning the distributor cap is essential for maintaining the health of your car’s engine. If you are unsure about how to clean the distributor cap, read on to get answers to the most commonly asked questions about it.
Question 1: What is a distributor cap and why should I clean it?
The distributor cap is a crucial component of your car’s ignition system. It is responsible for distributing the electrical current from the ignition coil to the spark plugs in the correct firing order. Over time, the distributor cap can accumulate dirt, debris, and moisture, which can cause the engine to misfire, run rough, or even fail to start. Cleaning the distributor cap helps to ensure that it functions properly and keeps your engine running smoothly.
To clean the distributor cap, you will need a few basic tools, including a screwdriver, a soft-bristled brush, and a can of electrical contact cleaner. Start by removing the distributor cap from the engine and inspecting it for any cracks or signs of wear. If the distributor cap is damaged, it will need to be replaced. If it is in good condition, use the soft-bristled brush to remove any debris or dirt from the inside and outside of the cap. Spray the electrical contact cleaner onto the cap and wipe it clean with a lint-free cloth. Reinstall the distributor cap onto the engine and start the car to test its performance.
Question 2: How often should I clean the distributor cap?
The frequency with which you need to clean your distributor cap depends on several factors, including the age of your car, the driving conditions, and the quality of the components. As a general rule, you should inspect the distributor cap during regular maintenance checks and clean it as needed. If you notice any signs of wear or damage, such as cracks or corrosion, you should replace the distributor cap immediately.
Question 3: Can I clean the distributor cap myself, or do I need to take it to a mechanic?
Cleaning the distributor cap is a relatively simple task that most car owners can do themselves. However, if you are not comfortable working on your car’s engine or are unsure about how to remove the distributor cap, it is best to take it to a mechanic for cleaning. A professional mechanic will have the tools and expertise needed to safely and effectively clean the distributor cap and inspect it for any signs of wear or damage.
Question 4: What are the signs that my distributor cap needs cleaning?
There are several signs that your distributor cap may need cleaning, including rough idling, engine misfires, difficulty starting the car, and a decrease in fuel efficiency. If you notice any of these symptoms, it is important to inspect the distributor cap and clean it if necessary. Regular inspections and cleaning can help to prevent more serious engine problems down the road.
Question 5: What other parts of the engine should I clean along with the distributor cap?
In addition to cleaning the distributor cap, it is important to inspect and clean other components of the ignition system, such as the spark plugs, ignition wires, and rotor. These parts can also accumulate dirt and debris over time, which can cause the engine to run poorly or fail to start. Regular maintenance and cleaning of these components can help to keep your engine running smoothly and prevent costly repairs in the future.
“cleaning” a CAP & ROTOR on a chevy engine 350, 327, 305 (5.7L)
In conclusion, cleaning your distributor cap is a simple process that can save you time and money in the long run. By following the steps outlined above, you can ensure that your vehicle is running smoothly and efficiently. Remember to always use caution when working with electrical components and to consult your vehicle’s owner manual if you have any questions.
Additionally, regular maintenance of your vehicle’s ignition system can prevent more serious problems from occurring. By keeping your distributor cap clean and in good condition, you can avoid issues such as misfires and stalling. Make it a habit to check your distributor cap during routine maintenance, and clean it as needed to keep your vehicle running at its best.
Overall, taking care of your vehicle’s ignition system is an important part of vehicle maintenance. By keeping your distributor cap clean and in good condition, you can ensure that your vehicle is running smoothly and efficiently. So take the time to clean your distributor cap regularly, and enjoy the benefits of a well-maintained vehicle.
