In today’s world, our phones have become an extension of our hands. We use them for everything, from browsing the internet to making phone calls. However, with constant use, our phones are prone to collecting dirt and dust, especially in the mic area. If you’re struggling to hear or be heard during calls, it may be time to clean your phone mic. In this article, we’ll walk you through some simple steps to help you get your mic back to working properly.
Cleaning your phone mic is not only essential to improve call quality but also to prevent germs and bacteria from accumulating on your phone. With the ongoing pandemic, it’s more important than ever to keep our phones clean. So, let’s dive in and learn how to clean your phone mic effectively.
How to Clean Phone Mic?
To clean your phone mic, follow these simple steps:
- Turn off your phone and remove the case.
- Use a soft-bristled brush or toothbrush to gently remove any debris from the mic area.
- Dampen a cotton swab with rubbing alcohol or water and gently clean the mic hole.
- Let the mic dry completely before using your phone again.
How to Clean Phone Mic? – A Step-by-Step Guide
Keeping your phone’s microphone clean is an essential task, especially if you use your phone for important calls or recordings. A dirty microphone can cause muffled audio, crackling sounds, or even complete audio failure. In this article, we’ll show you how to clean your phone’s microphone to ensure clear audio quality.
Step 1: Power off your phone
Before you start cleaning your phone’s microphone, it’s important to turn off your device. This will prevent any accidental button presses or screen taps while you’re cleaning.
Once your phone is off, you can begin with the cleaning process.
Benefits of powering off your phone before cleaning the microphone:
- Prevents accidental damage to your phone while cleaning
- Ensures that your phone doesn’t pick up any unwanted sounds during cleaning
- Helps to prolong your phone’s battery life
Step 2: Locate your phone’s microphone
Before you start cleaning your phone’s microphone, you need to know where it’s located. In most smartphones, the microphone is located at the bottom of the phone, near the charging port.
Benefits of knowing the location of your phone’s microphone:
- Helps to prevent accidental damage to other parts of your phone
- Makes it easier to target the specific area that needs cleaning
- Prevents the need for disassembling your phone unnecessarily
Step 3: Remove any cases or covers
Before you start cleaning your phone’s microphone, remove any cases or covers that may be covering it. This will help you to access the microphone easily and clean it thoroughly.
Benefits of removing cases or covers:
- Prevents any debris from accumulating on the inside of the case or cover
- Makes it easier to access and clean hard-to-reach areas
- Ensures that you’re not cleaning the case or cover instead of the microphone
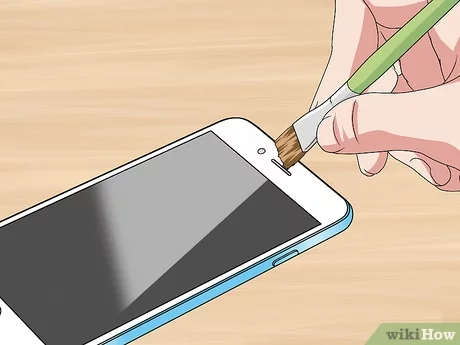
Step 4: Use a soft-bristled brush to remove debris
Use a soft-bristled brush, such as a toothbrush or a makeup brush, to gently remove any debris that may be covering your phone’s microphone. Be sure to brush in all directions to ensure a thorough clean.
Benefits of using a soft-bristled brush:
- Prevents any damage to the microphone itself
- Helps to remove stubborn debris that may be stuck to the microphone
- Ensures that you’re not using anything that could scratch or damage your phone’s screen
Step 5: Use a toothpick to remove any remaining debris
If there are any stubborn debris that won’t come off with a soft-bristled brush, use a toothpick to gently remove them. Be careful not to insert the toothpick too far into the microphone, as this could damage it.
Benefits of using a toothpick:
- Allows you to target specific areas that may be hard to reach with a brush
- Helps to remove any debris that may be stuck in the microphone’s crevices
- Ensures that you’re not using anything that could damage your phone’s screen or microphone
Step 6: Use a microfiber cloth to wipe the microphone
Once you’ve removed all the debris, use a microfiber cloth to gently wipe the microphone. Make sure to wipe in all directions to ensure a thorough clean.
Benefits of using a microfiber cloth:
- Helps to remove any remaining debris or fingerprints
- Doesn’t leave any lint or residue on your phone’s screen or microphone
- Ensures that your phone’s microphone is clean and ready to use
Step 7: Power on your phone and test the microphone
After you’ve completed the cleaning process, turn on your phone and test the microphone to ensure that it’s working correctly. Make a test call or record a voice memo to check the audio quality.
Benefits of testing your phone’s microphone:
- Allows you to ensure that your phone’s microphone is working correctly
- Helps to prevent any future issues with audio quality
- Ensures that you’re not missing any important calls or recordings due to a dirty microphone
Step 8: Repeat the cleaning process regularly
To prevent any future issues with your phone’s microphone, it’s important to clean it regularly. Make a habit of cleaning your phone’s microphone every few weeks or whenever you notice a decrease in audio quality.
Benefits of regular cleaning:
- Prevents any buildup of debris that could cause audio issues
- Helps to prolong the life of your phone’s microphone
- Ensures that you always have clear audio quality on your phone
Conclusion
Cleaning your phone’s microphone is a simple and easy task that can help to ensure clear audio quality for important calls and recordings. By following these steps and cleaning your phone’s microphone regularly, you can prevent any future issues with audio quality and ensure that your phone’s microphone lasts for a long time.
Frequently Asked Questions
Here are some common questions related to cleaning phone mic:
Q: Why should you clean your phone mic?
Regular cleaning of your phone mic helps to maintain its functionality and improves the quality of your phone calls. A dirty mic can cause muffled sound or crackling noise during phone calls. Moreover, regular cleaning can prevent the buildup of bacteria and germs on your phone, which can cause health issues.
Therefore, cleaning your phone mic is an essential task that you should perform regularly to ensure that your phone continues to function correctly and to avoid any health issues.
Q: How often should you clean your phone mic?
You should clean your phone mic every two weeks or whenever you notice that the sound quality during phone calls is not up to the mark. However, if you are someone who frequently uses their phone, you may want to clean your phone mic more often to ensure that it remains clean at all times.
Additionally, if you have dropped your phone, exposed it to water or any other liquid, or if it has been in a dusty environment, you should clean your phone mic immediately to prevent any damage to it.
Q: What is the best way to clean your phone mic?
The best way to clean your phone mic is to use a soft-bristled toothbrush or a clean, dry, and soft cloth. Firstly, turn off your phone to avoid any damage to it. Then, gently brush or wipe the mic area to remove any dirt, dust, or debris. It is recommended to use a toothbrush as it can effectively reach the corners of the mic area.
Alternatively, you can use a can of compressed air to blow off any dirt or debris. However, be cautious while using compressed air as it can damage your phone mic if used improperly.
Q: Can you use water to clean your phone mic?
No, you should not use water to clean your phone mic as it can damage it. Water can seep into the mic and cause it to stop working altogether. Additionally, water can cause corrosion, which can further damage the mic. Therefore, it is recommended that you use a dry cloth or a toothbrush to clean your phone mic.
If, however, your phone has been exposed to water or any other liquid, you should turn it off immediately and take it to a certified technician for repair.
Q: What are some signs that your phone mic needs cleaning?
If you notice that your phone calls sound muffled or if you hear crackling noises during phone calls, it could be a sign that your phone mic needs cleaning. Additionally, if you find it difficult to hear the other person’s voice during calls, it could be another sign that your phone mic needs cleaning.
Moreover, if you notice that the voice recognition feature on your phone is not working properly, it could be due to a dirty mic. In such cases, you should clean your phone mic immediately to avoid any further damage to it.
How To Clean a Microphone Port Hole on a Smart Phone
In conclusion, cleaning your phone mic is essential for maintaining its functionality and keeping it free from dirt and debris. By following the simple steps outlined above, you can effectively clean your phone mic and ensure that your calls and recordings sound clear and crisp.
Remember to use a soft-bristle brush, a microfiber cloth, and a gentle cleaning solution to avoid damaging your phone. Additionally, avoid applying excessive pressure or liquid to the microphone area.
By regularly cleaning your phone mic, you can prevent any potential issues and prolong the lifespan of your device. So take the time to clean your phone mic today and enjoy crystal-clear sound quality on all your calls and recordings.
